How to maximize your DDR5 memory's potential through GIGABYTE UC BIOS
Are you maximizing your memory speed? Whether you're using native DDR5 modules or employing XMP memory, did you know that you can overclock your memory effortlessly and get an extra performance boost for free? This article will equip you with the knowledge and tools you may not be aware of to effortlessly supercharge your PC using the user-friendly GIGABYTE UC BIOS.
Effortless Tweaking for Everyone
The UC BIOS makes memory optimization a breeze for everyone, even if your DDR5 memory is non-XMP and runs at standard speeds. In Easy Mode, simply activate the DDR5 Auto Booster. This nifty feature effortlessly elevates your memory frequency from 5600MHz to a respectable 6000MHz, giving your system an additional boost.
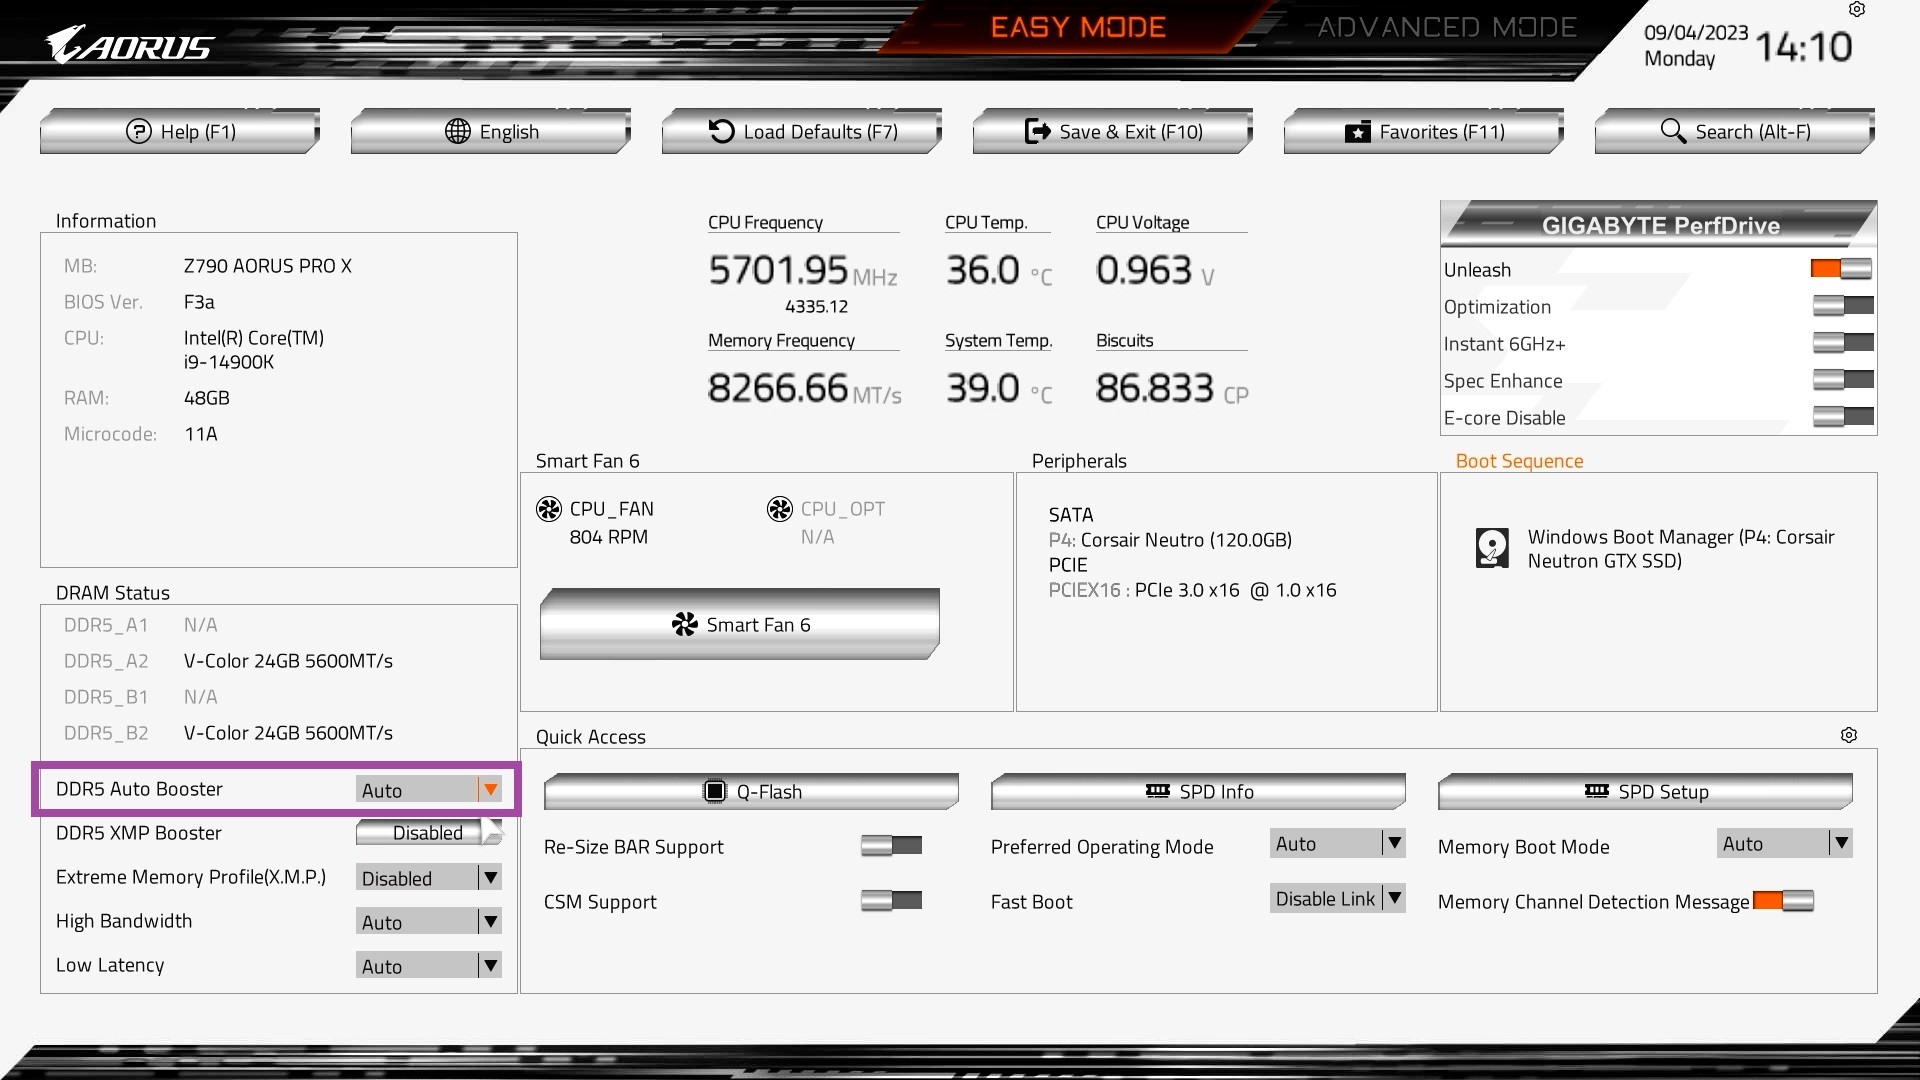
If you own XMP memory, you can unleash its performance by the highest profile with the DDR5 XMP Booster. This exclusive function, optimized for major memory brands like Micron, Samsung, and Hynix, delivers superior performance compared to standard XMP profiles. Witness your memory frequencies soar to 8266 MHz or even higher, perfectly complementing your cutting-edge CPU.
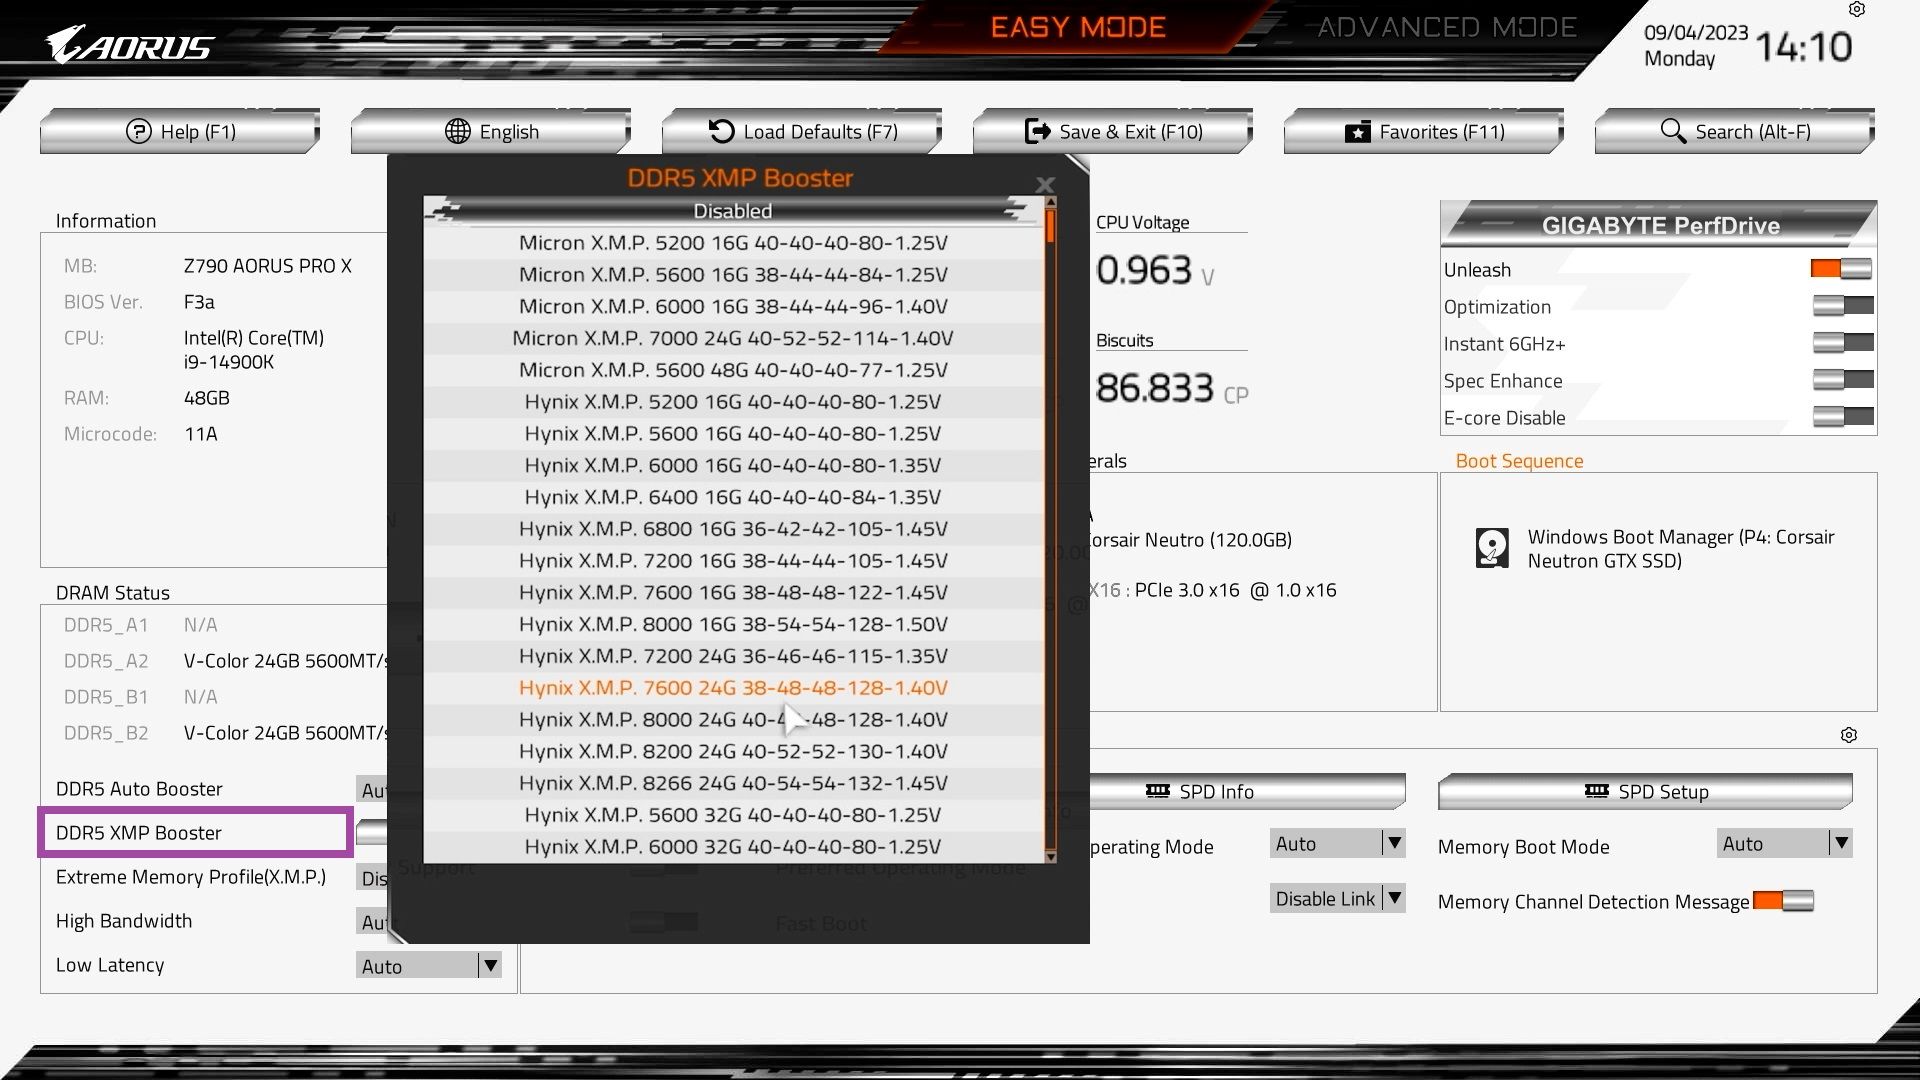
Of course, the classic Extreme Memory Profile (XMP) offers a reliable option. Simply enable it from the menu to leverage the built-in memory profiles for a safe and convenient performance boost.
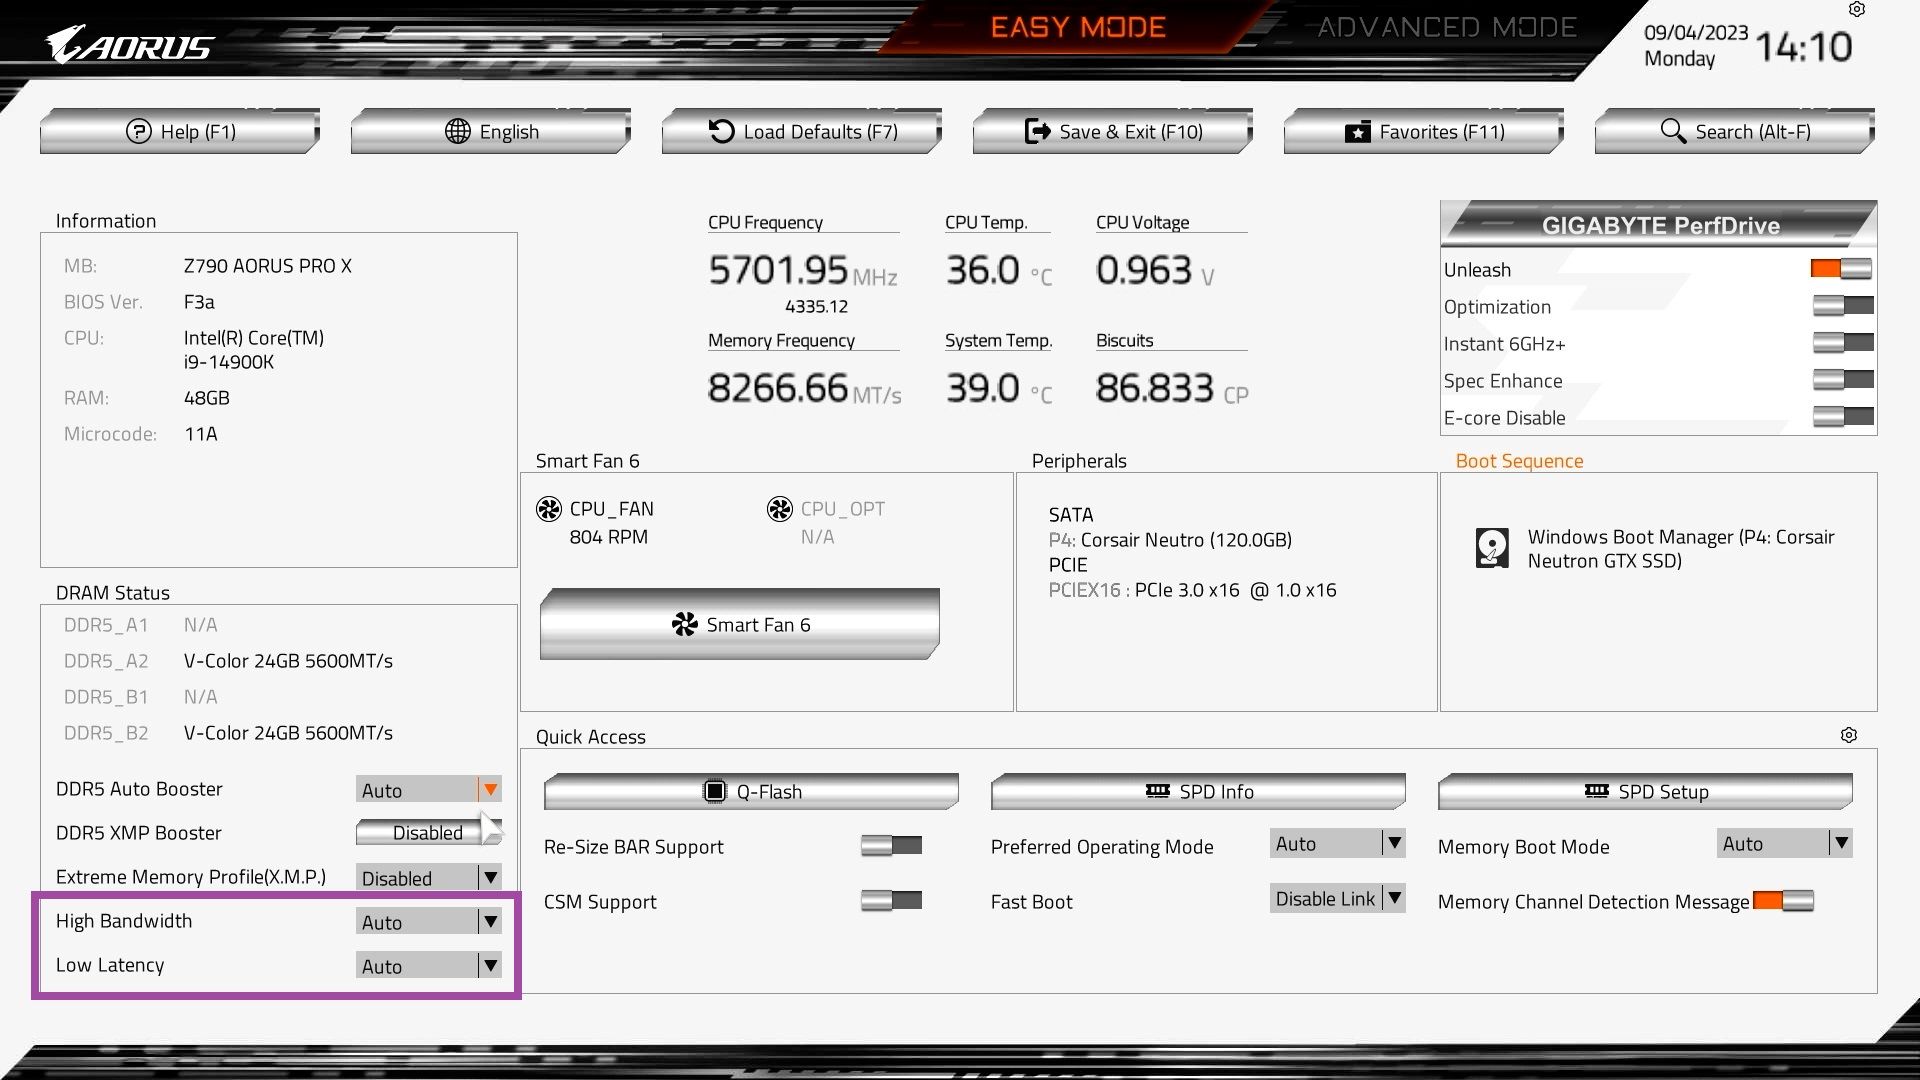
The good stuff doesn’t stop there. You can further unleash the full potential of your memory with features like High Bandwidth and Low Latency. These aptly named settings instantly translate to a 12% increase in bandwidth and a 3ns reduction in latency on top of XMP settings, resulting in an impressive 10% performance gain. The beauty lies in their synergy – you can enable both High Bandwidth and Low Latency alongside XMP to truly reap the rewards of optimized memory.
Fine-tuning for the Enthusiast
For those who like to tinker under the hood, dive into the SPD Setup interface, where you have the freedom to fine-tune every parameter using XMP profiles or custom values. Create and save up to two personalized XMP profiles to tailor your memory performance to your specific needs. Remember, while tweaking parameters, proceed with caution when High Bandwidth and Low Latency are enabled, as adjustments can affect their intended performance.
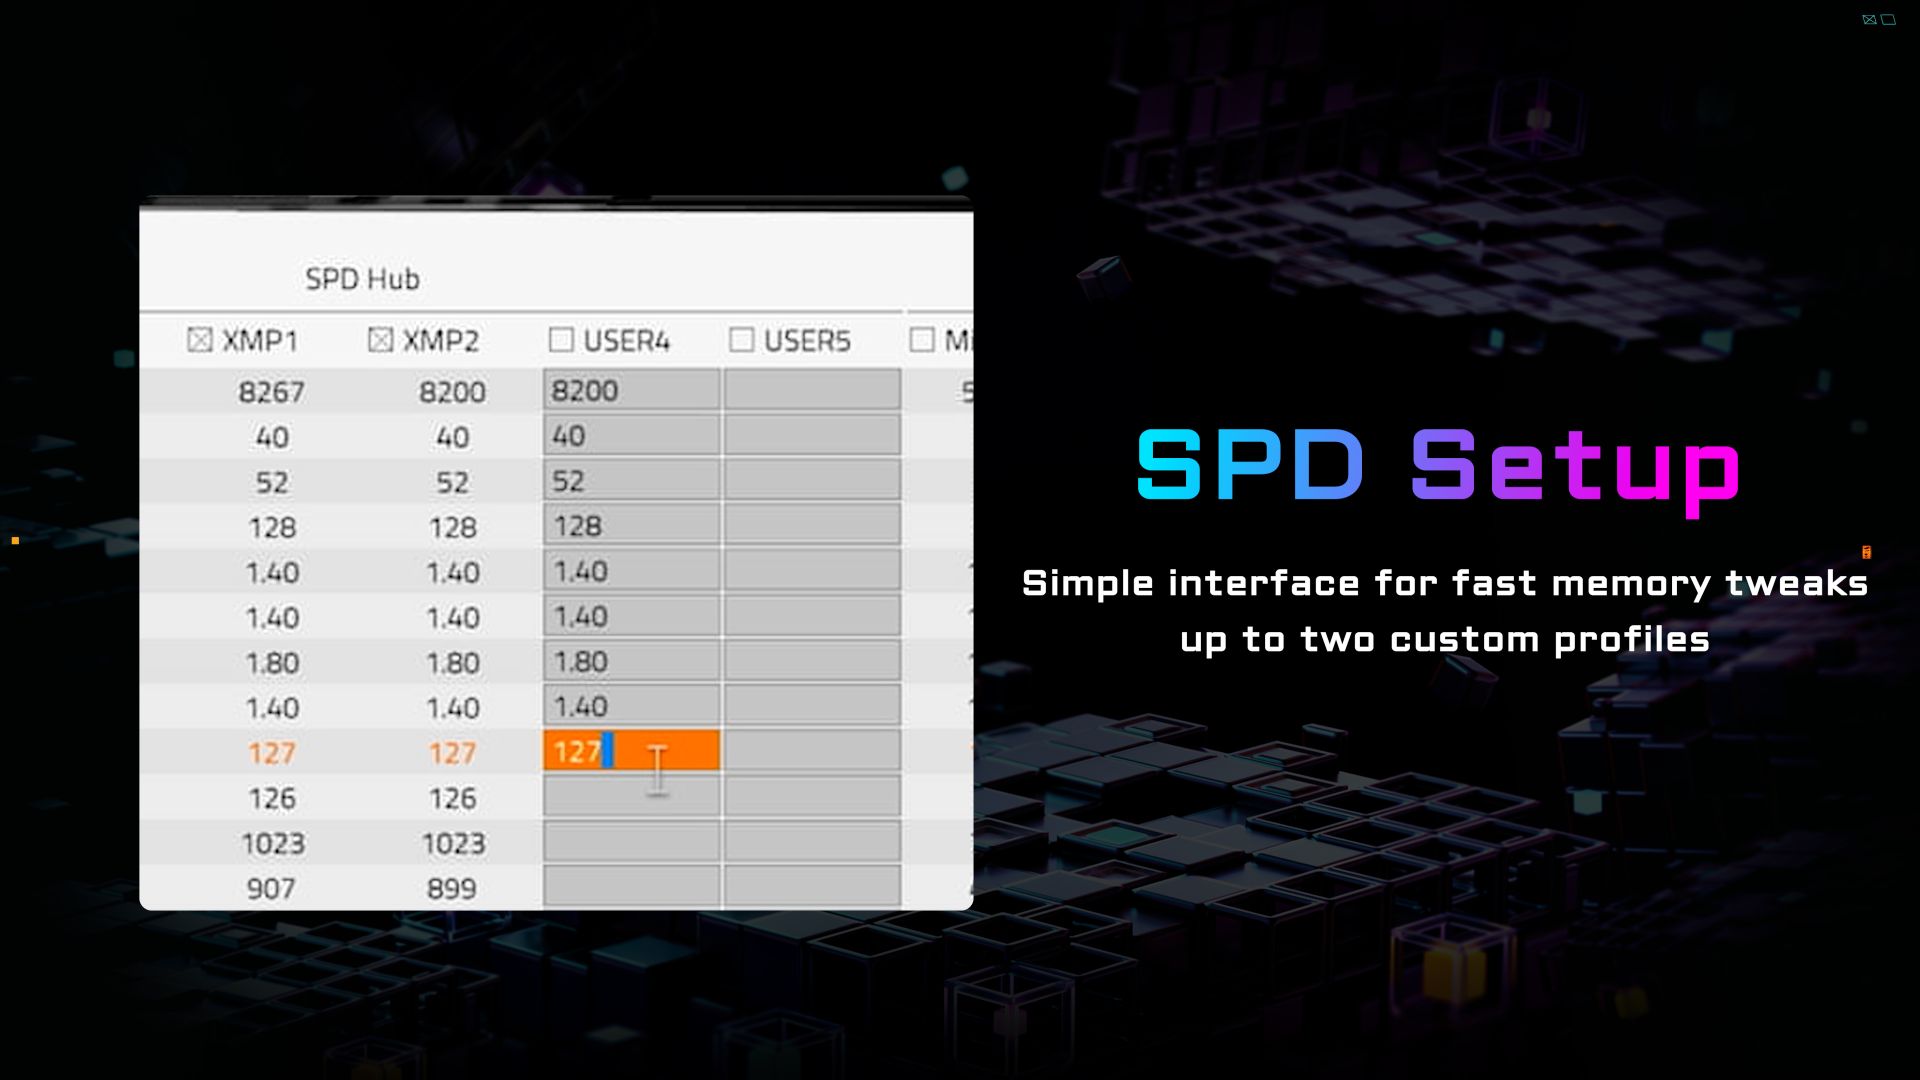
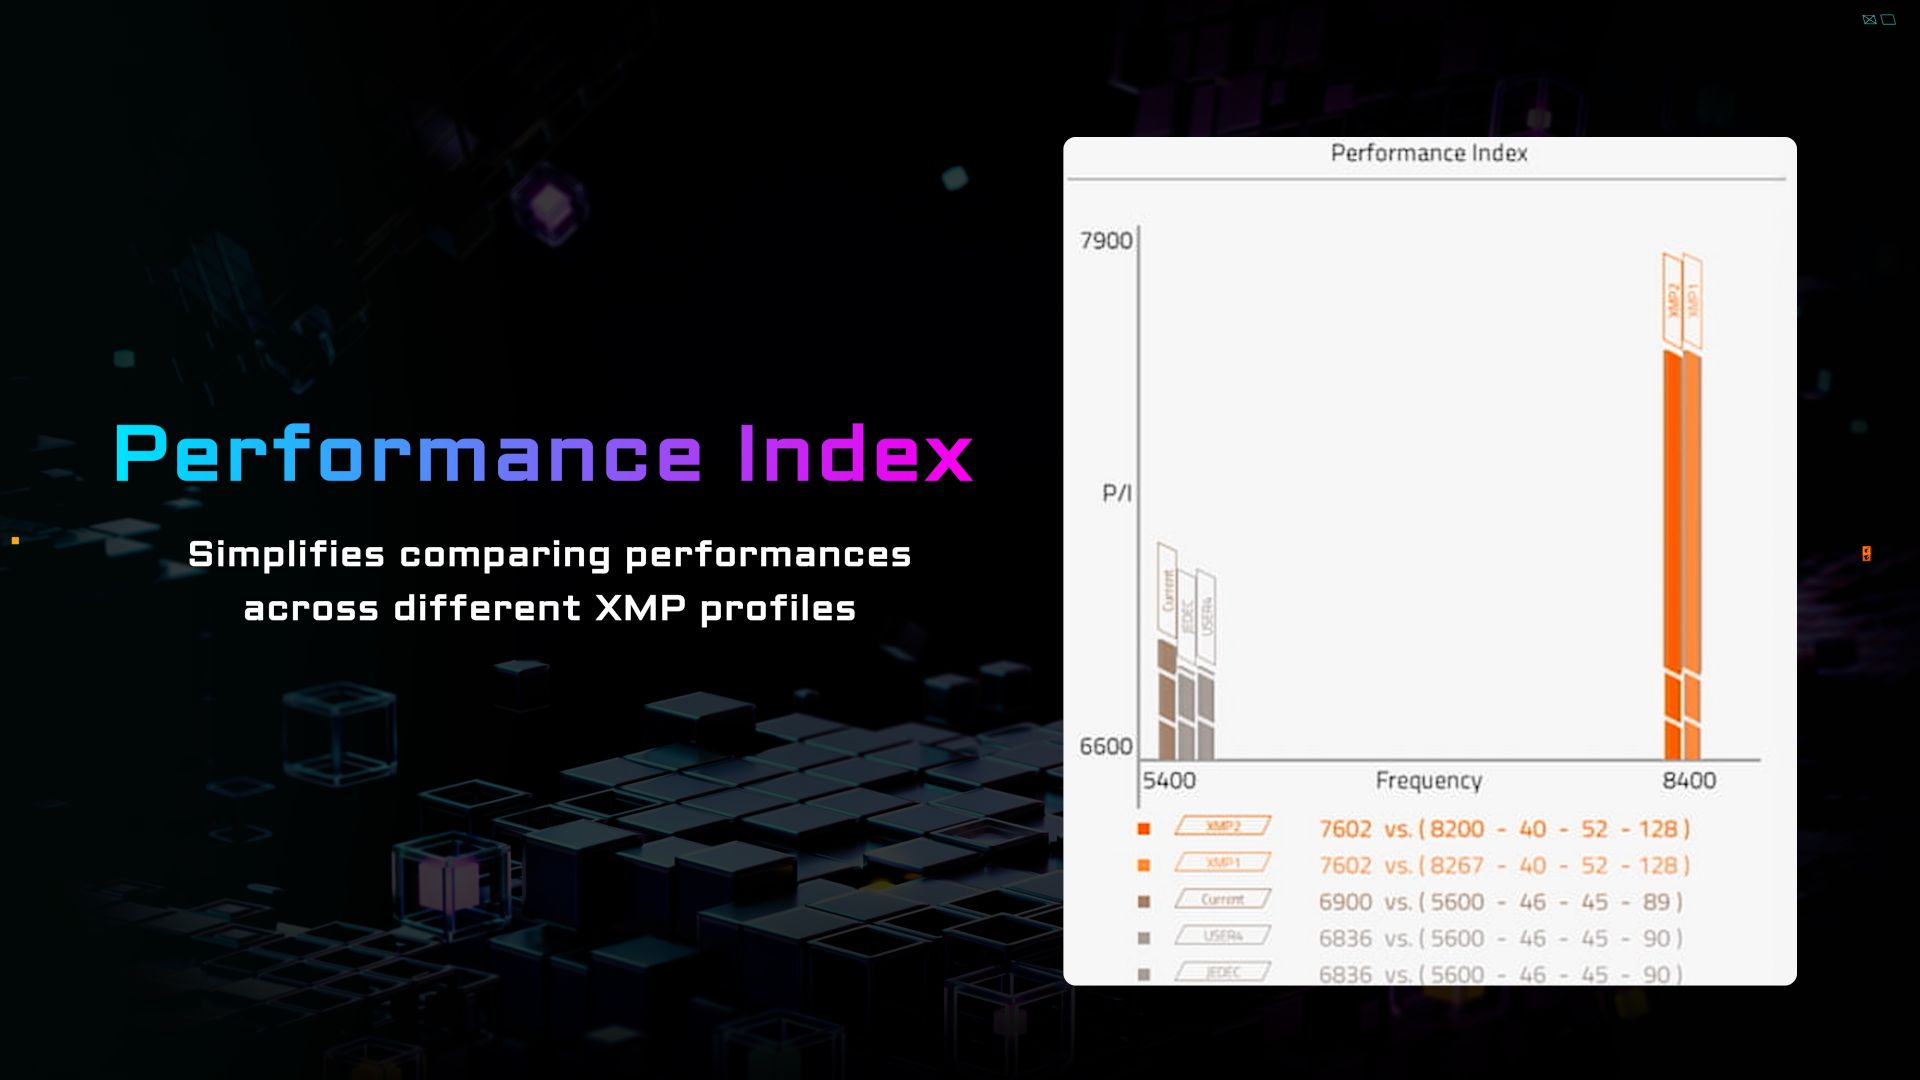
To help you navigate the world of custom profiles, we also provide an exclusive Performance Index. This handy tool lets you easily compare the performance of different XMP profiles, giving you a clear picture of how your manual tweaks stack up. Once you've crafted the perfect settings, use the Save SPD Profile function to store them for future use or share them with fellow enthusiasts.
Tips and Tricks for Peak Performance
Pushing the limits of memory overclocking is exciting, but remember, if your system encounters instability, simply restart your PC a few times. The UC BIOS will automatically take you back to the last working settings, ensuring a smooth and stable experience.
Also, take note that memory overclocking stability can vary depending on your CPU and the BIOS version. To maximize stability, consider updating to the latest BIOS, which often brings improved memory compatibility and performance. Check out our Q-Flash tutorial video for easy instructions on BIOS updates.
Unleash the Potential Within
With our user-friendly BIOS and powerful memory tuning options, you have the keys to unlock the hidden potential within your PC. Whether you're a seasoned overclocker or simply looking for a performance boost, our tools cater to every level of expertise. So, dive in, explore the features, and experience the incredible performance gains that await!
Happy tuning!
Learn More:
-Beginners 101 – What is a motherboard?
-Beginners 101 – 5 Tips When Purchasing RAM